
What Goes Into a Professional Vehicle Logo Installation
When San Diego businesses want company logos on their work vehicles, the process requires more than printing a sticker. Professional vehicle logo installation combines accurate measurements, commercial-grade vinyl, and installation techniques that keep your branding intact through years of daily use.
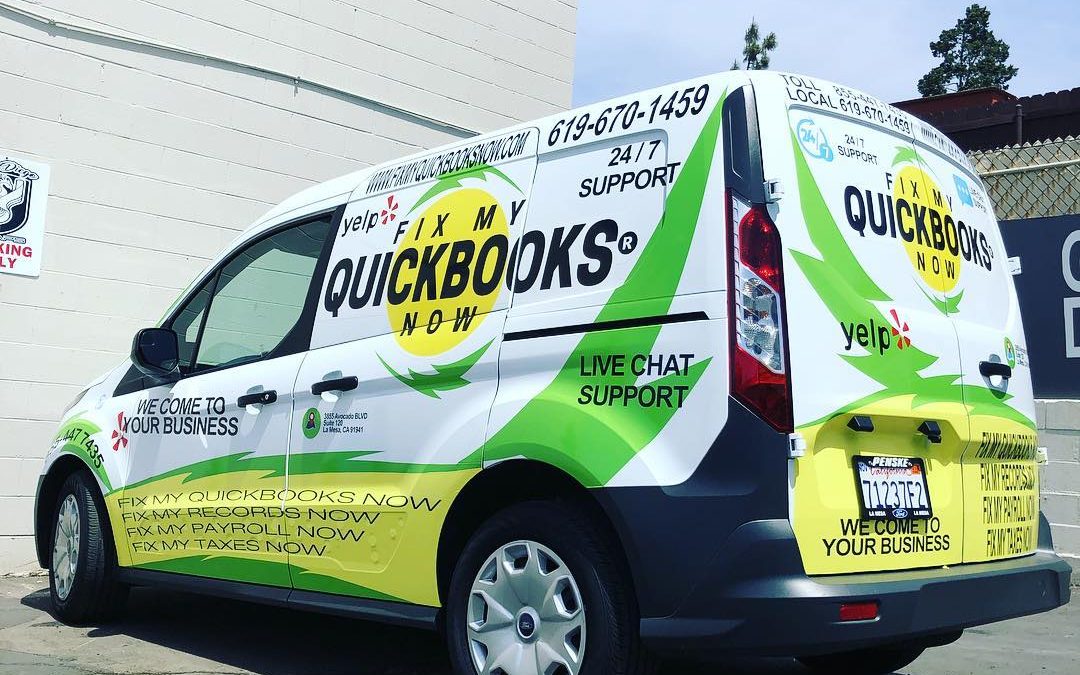
Sun Diego Wraps handles custom business vehicle logos for companies across San Diego County. Whether you operate one truck or manage a twenty-vehicle fleet, each project follows the same production and installation standards. The result is logo work that holds up to car washes, highway driving, and constant California sun exposure.
Business owners who understand the logo production process make better decisions about timing, budgeting, and design choices. Here’s how vehicle logos go from digital files to professional installations that last.
The Design and File Preparation Phase
Converting Your Logo for Vinyl Production
Vehicle logo projects begin with your existing brand files. Designers convert standard image formats into vector files that scale to any size without losing sharpness. Rasterized or low-resolution logos look pixelated when enlarged for vehicle surfaces, so this conversion step protects your brand appearance.
Color Matching and Material Selection
Vinyl manufacturers produce materials in standardized color systems. Your designer matches your brand colors to available vinyl options, checking that vehicle graphics stay consistent with business cards, signage, and website colors.
Vehicle Measurement and Template Creation
Before production begins, installers measure the specific vehicle surfaces designated for logos. Door panels, tailgates, hoods, and side panels all have unique curves, body lines, and hardware that affect logo placement and sizing.
Professional shops create templates from actual vehicle measurements rather than generic dimensions. This step prevents graphics that don’t fit correctly or sit awkwardly around handles, mirrors, and trim pieces. Template work takes time but eliminates costly reprints and installation delays.
Material Cutting and Preparation
Plotter Cutting Technology
Commercial vinyl cutters use computer-controlled blades to cut logo shapes from vinyl sheets. The cutting data comes directly from approved design files, ensuring accuracy on small text, thin lines, and detailed graphics.
Weeding and Transfer Tape Application
After cutting, technicians remove excess vinyl surrounding the logo shapes. This task, called weeding, leaves only the intended design elements on the backing paper. Transfer tape then covers the weeded design, letting installers move the complete logo from backing material to vehicle surface as one piece.
Surface Preparation for Installation
Clean vehicle surfaces determine how well logos adhere and how long they last. Professional preparation includes:
- Washing the panel with automotive-grade soap to remove road grime
- Wiping with isopropyl alcohol to eliminate wax, polish, and oil residue
- Allowing surfaces to dry completely before any vinyl application
- Inspecting for paint chips or rust that could compromise adhesion
Rushing through surface prep causes logos to peel, bubble, or fail before their expected lifespan ends. Most adhesion failures trace back to inadequate cleaning rather than material defects.
The Installation Process
Wet vs. Dry Application Methods
Professional installers use two main techniques for vehicle logos. Dry application suits smaller graphics on flat surfaces. Wet application involves a slip solution that allows repositioning during the placement phase.
Most vehicle logo work uses wet application. The method forgives minor alignment errors and gives installers control over final positioning before the adhesive sets permanently.
Squeegee Technique and Heat Setting
Once positioned, installers use professional squeegees to force application fluid and air from beneath the vinyl. The technique moves from center outward, pushing bubbles toward edges rather than trapping them in the middle of the graphic.
Heat guns help vinyl wrap around curved surfaces and conform to factory body lines. Controlled heat also activates adhesive compounds, creating stronger bonds between vinyl and vehicle paint.
Quality Checks and Edge Sealing
Completed installations go through inspection for air bubbles, lifted edges, and alignment accuracy. Installers address any issues immediately while the vinyl material remains workable.
Edge sealing with directed heat ensures that logo borders and corners stay down through repeated washing and normal vehicle use. This finishing step protects corners near door handles, mirrors, and other high-contact areas where edges might otherwise catch and lift over time.
Caring for Your Vehicle Logos After Installation
Proper maintenance extends logo life significantly. New installations require 24-48 hours before any washing to allow full adhesive curing.
For long-term logo care:
- Use hand washing or touchless automated washes
- Keep high-pressure sprayers away from graphic edges
- Apply vinyl-safe UV protectant products seasonally
- Fix any lifted edges quickly before dirt works underneath
Ready for professional logos on your work vehicles? Contact Sun Diego Wraps for a quote on custom vehicle graphics that put your San Diego business in front of customers on every job site, delivery route, and parking lot in the county.